Powder coating is one of the most popular methods of applying attractive, durable and flexible coatings to a variety of products and surfaces. Plus, the powder coating process not only improves the aesthetic appeal of surfaces, but also helps provide additional protection against corrosion, scratches and other types of damage. One of the key stages of the powder coating process is the use of masking materials, which allow you to accurately determine which parts of the surface are subject to powder coating.
The baking temperature of powder paint ranges from 170 to 220 ° C. Therefore, the protection of segments that are not subject to painting should be carried out only with heat-resistant self-adhesive materials, which we will discuss in detail below.
Products
Heat-resistant materials for masking during powder coating are made of thermal tape, polyimide, polyester. The same materials can be purchased in two main versions: tape and mask.

Tapes
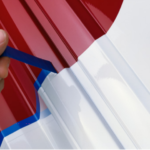
High-temperature tape rolls are ideal for creating straight lines and protecting complex parts. The thickness and density of the material do not allow making curved lines. We cut tapes of individual width. For figured masking, we recommend using masks.
Go to products in the category high-temperature tapes

Masks
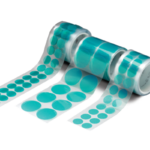
For masking segments of arbitrary shape, use ready-made die-cut circles or figures on a backing. Masks save time in serial production. We produce die-cutting of masks on an individual order.
Go to products in the category high-temperature masks
What is Masking in Powder Coating?
The powder coating process involves applying electrostatically charged powder particles to a surface using specialized equipment. This powder is then heated to a specific temperature, causing it to fuse with the base material, creating a durable coating.
Powder coating masking is the process of applying unique masking materials, such as masking discs and high temperature tape, to specific areas of a surface. These masking materials create a barrier that prevents the powder from sticking to specific areas of the surface.
For example, masking can be used to protect electrical contacts on a piece of equipment or to prevent logos from being covered. Masking is an important process for many powder coating projects for a number of reasons. It ensures that companies can preserve critical product features that could be damaged by powder coating (such as grilles or electrical components).
It also ensures that companies have complete control over the outcome of their powder coating. With masking, you can create unique patterns, achieve professional results on precision machined parts, and even save time and money on powder coating resources.
Benefits
Powder coating masking can help improve the results of the powder coating process in a variety of ways. Some of the main benefits include:
Improved Aesthetics
Masking agents, such as silicone adhesive or polyester tape, allow you to create unique patterns and intricate designs. This gives you more control over the final look of any project. You can even ensure that decorative lines remain perfectly straight.
Precise Fit
With masking, you can ensure that important components or surface features are not covered in a durable powder coating. This ensures that screws, bolts, and nuts can be securely fastened in their intended locations.
Protect Sensitive Areas
Some parts of a product can be damaged by exposure to powder coating agents. Masking plugs can help protect electrical outlets, ports, and gaskets. Masking tape can prevent grids and critical connections from becoming covered.
Minimized Risk of Leakage
Effective masking can reduce the risk of powder coatings penetrating gasket surfaces. This is important in environments where gaskets help create watertight or airtight seals.
Increased Efficiency
Strategic masking of powder coating helps ensure that only the necessary parts of the surface are treated. This reduces waste, saves powder coating materials, and minimizes manufacturing costs.
The Masking Process
The masking process in a powder coating process can vary depending on the experts you choose to work with. However, usually, the steps involve:
1. Selecting the right Masking Material
The first step in the masking process is choosing the right masking materials, based on the specific needs of your project. You’ll need to ensure you’re choosing a material with excellent chemical resistance, and the ability to withstand the high temperatures used in the curing process.
It may be valuable to use various types of masking materials, such as polyimide tape, as well as plugs and masking discs, to achieve specific results.
2. Preparing the Surface
After choosing the right masking material, surfaces need to be prepared for both the application of the masking substance, and for the powder coating process. Surfaces need to be cleaned of any grease, dirt, or contaminants which may interfere with the adhesion of masking material.
It’s also worth ensuring any imperfections are removed from the surface before applying powder coatings, to preserve a uniform finish.
3. Cover Large, Flat Areas, Followed by Smaller Components
When applying masking for powder coating, it usually makes sense to cover large, flat areas first. Using films and papers, as well as high temperature tape, can help to create clean boundaries and edges on a surface, before you begin to work on more intricate details.
Once you’ve covered the larger areas, focus on sealing openings, threaded holes, and other components of your surface with caps and plugs.
4. Inspect the Masking
Before the powder coating process begins, take a moment to carefully inspect all of the masked areas. Ensure there aren’t any bubbles or gaps that could allow the powder to infiltrate the parts of your project you want to preserve.
Replace any peeling tape, and double check that all of the most important elements of your project have been properly protected.
5. Apply the Powder Coating and Cure
Once you’re happy with the results of the masking process, the next step is applying the powder coating. It’s important to apply the powder evenly and consistently to the key areas of your item, following guidelines provided by a manufacturer carefully.
Once the material has been fully coated in the powder, transfer it to the curing oven so the powder can melt and fuse with the surface of your product.
6. Remove the Masking Materials and Inspect
Finally, once the curing process is done, remove the masking materials carefully. Most materials, such as green polyester tape and glass cloth tape can simply be peeled from the surface. Be careful when removing masking materials, to ensure clean edges and results.
After removing all of the masking materials and any residual adhesive residue, conduct a final inspection of your product, checking for irregularities or errors.


